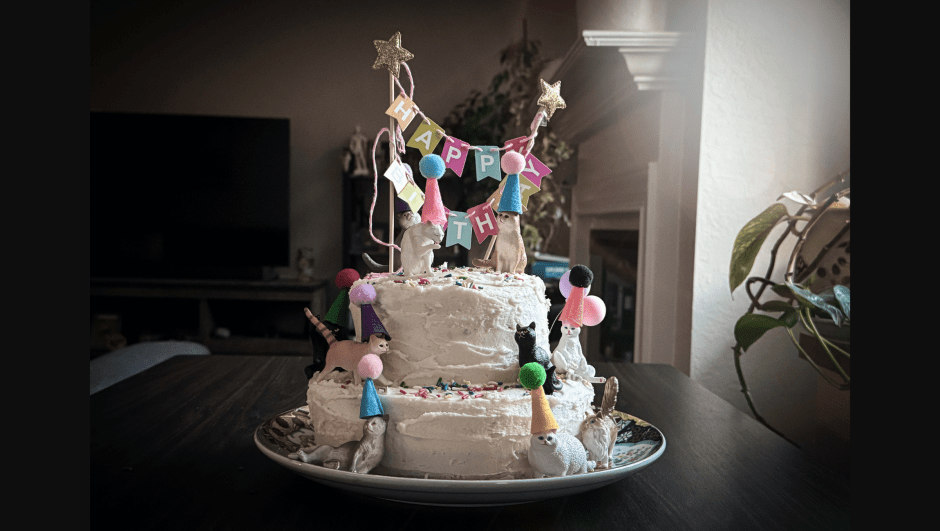
Birthdays in our kitchen usually come with a specific set of culinary traditions (i.e. “Dirt Cake”), but when Eva celebrated her birthday last weekend, she completely surprised me. She didn’t ask for the traditional trifle of crushed Oreos layered with a conglomeration of pastry cream, whipped cream, and cream cheese, and hidden gummy worm gems sandwiched between the layers. Instead, with her signature mischievous side eye, she presented me with these adorable miniature feline decorations and requested a “Crazy Cat Lady Cake.”
How could I possibly resist?
To give her whimsical vision the decadent foundation it deserved, I turned to my absolute favorite dark chocolate cake recipe. I wanted the presentation to feel slightly dramatic, so I tripled the batter to make four thick, rich layers.
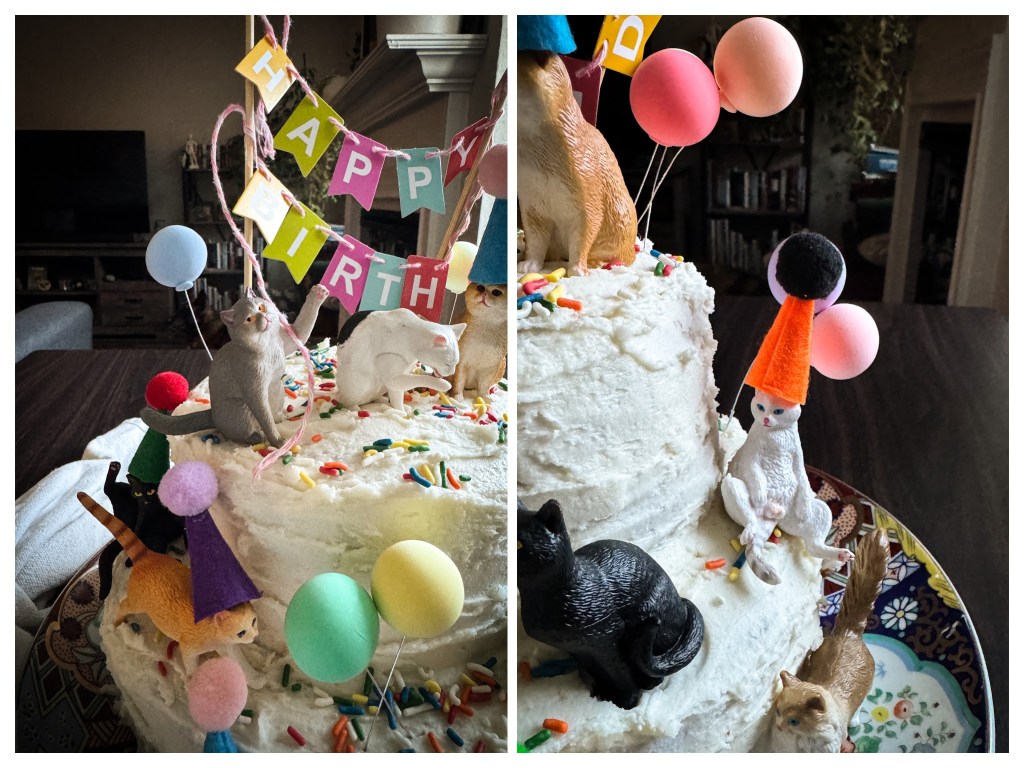
Knowing a proper cat lady needs plenty of room for her companions to lounge, I decided on a tiered silhouette to create a little frosted “shelf.” The sturdy base was built from two 8-inch rounds in which I secured a little cardboard platform on which a 6-inch crown was placed. Once it was enveloped in a messy “crumb coat,”* and a slightly cleaner swooping layer of vanilla buttercream, it became the perfect blank canvas. I topped it with a smattering of colorful sprinkles and placed those tiny cats along the frosted ledges. Creating this cake brought such a wonderful, playful energy to the kitchen—a perfect reflection of Eva herself.

While the miniature cats undoubtedly stole the show, the true secret to this cake is its foundation. Building a tiered cake can sometimes feel intimidating, but it all comes down to a reliable, deeply chocolatey sponge, some reinforcements in the form of a small cardboard circle and two “legs” made out of drinking straws, and a buttercream sturdy enough to hold its shape and “glue” the whole thing together. Whether you are building a multi-tiered centerpiece or just a simple weekend dessert, here is exactly what I did to create this cake. It’s the perfect base cake for anything your wildest imagination can dream up.
Chocolate Layer Cake with Vanilla Buttercream
You will need two 8 inch round cake pans and two 6 inch round cake pans to make this cake.
- 3/4 cup butter
- 2 1 /4 cup white sugar
- 3 eggs, room temperature
- 1 TBSP pure vanilla extract
- 3 cups flour
- 3/4 cup cocoa powder
- 1/2 tsp salt
- 1 1/2 cup whole milk
- 1 1/2 tsp white vinegar
- 1 1/2 cup hot water
- 1 TBSP baking soda
Preheat your oven to 350 F (180 C). Butter two 8-inch/20-cm round cake pans and two 6-inch/15-cm cake pans. Trace the bottom of the pans on a piece of parchment paper and cut out the circles. Butter the pans and press the parchment into the bottoms. Butter the parchment and dust the inside of the pans with a little flour. Set aside.
In a very large mixing bowl, with an electric hand mixer, beat the sugar and butter until fluffy. Beat in the eggs and vanilla. Set aside.
Stir together the milk and the vinegar.
Sift the flour, cocoa powder and salt together in another bowl.
Beat half the flour into the butter and egg mixture, followed by half the milk. Add the remaining flour and remaining milk, mixing well after each addition.
Place the baking soda in a glass measuring cup and pour in the hot water. Stir until dissolved. Slowly beat the water into the batter until smooth, making sure to scrape down the sides and bottom of the bowl. The batter will be very thin.
Divide the batter into the prepared pans and tap the pans on the counter a few times to bring any air bubbles to the surface. Place cake pans in the preheated oven and bake for 20 – 30 minutes or until a cake tester inserted in the center comes out clean. Test the smaller cakes after 20 minutes, as they do not need as long to cook as the larger cakes. Cool the cakes completely. Remove from pans and set aside.
Vanilla Buttercream
- 1 1/2 cups butter, room temperature
- 6 cups confectioners sugar
- 1/3 cup whole milk
- 1 1/2 TBSP pure vanilla extract
- 1/4 tsp fine salt
- colorful sprinkles (to decorate)
Cream the butter in a large bowl with a hand mixer and the whisk attachment until smooth and fluffy. Gradually whisk in the confectioners’ sugar. Mix the milk and vanilla, then whisk into the confectioners’ sugar. Add in the salt in and whisk for 2 – 3 minutes until light and fluffy. If the frosting seems too dry, add in a splash more milk; if it seems too soft, sprinkle in a bit more confectioners’ sugar.
To construct the cake
Before you begin, you will need to create a simple support platform to prevent the top two layers from sinking into the bottom layers. Don’t worry! It’s easy and you probably have everything you need sitting around your kitchen. You will need a piece of cardboard, a drinking straw, and aluminum foil.
- Simply cut a piece of cardboard into a circle that is slightly smaller in diameter than the top layers of the cake.
- Wrap the cardboard circle in aluminum foil and set aside.
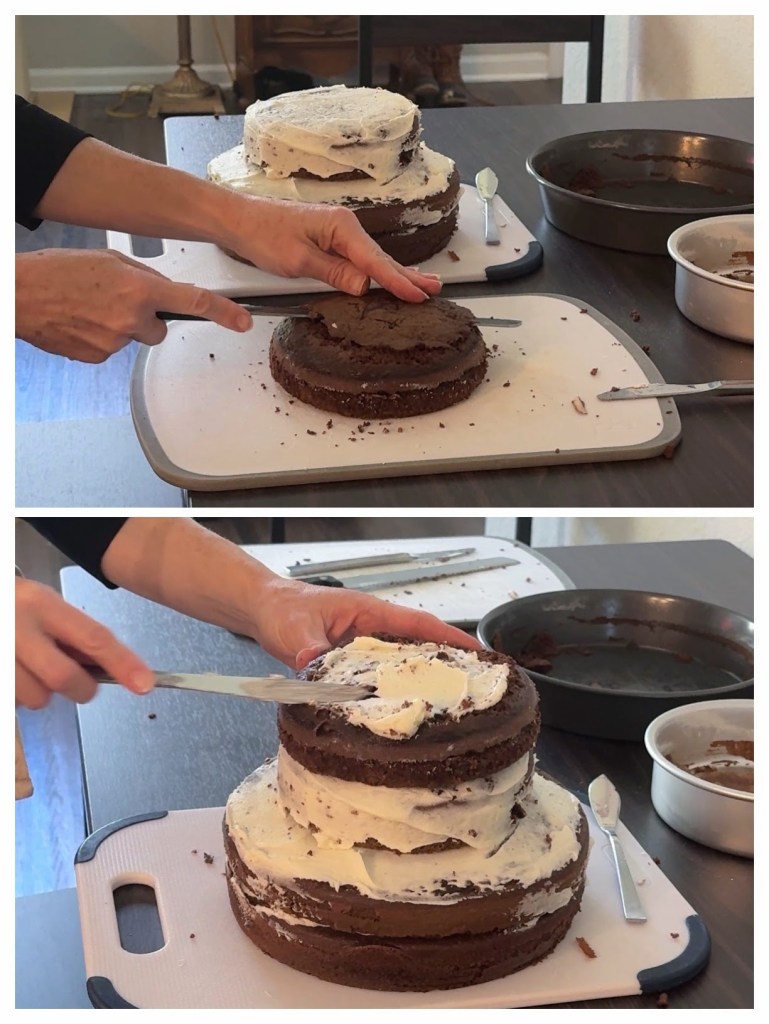
- Assess your cakes for levelness. If your cakes came out with domes on top, use a serrated knife to carefully cut off the top to level out the cakes. You don’t need to be precise, just eye-ball it.
- Divide the frosting evenly into 2 bowls (one for the “crumb coat” and one for the top coat). Set one bowl aside to be used later.
- Place one 8-inch cake on a cutting board or clean work surface.
- Frost the top and sides of the cake with frosting from the bowl you did not set aside. (This is the crumb coat frosting – do not worry about getting cake crumbs in this bowl. See note.*)
- Place the other 8-inch cake directly on top of the first and frost the sides and top with the crumb coat frosting.
- Now we will insert the support platform. Measure the drinking straw against the side of the cake and cut it to the exact height of the first two layers. Repeat so that you have two straws that are exactly the same height as the first two layers of the cake.
- Find the center of the cake and mark it in the frosting. Insert one straw vertically through the two cake layers approximately 1 inch from the center mark on the left. Insert the other straw about 1 inch from the mark on the right. The straws now be approximately 2 inches apart. They should touch the work surface and sit just at the level of the cake.
- Place the cardboard circle on top of the two support straws. Now you have a secure platform for the top two layers to rest on.
- Place one of the 6-inch cakes on the support platform.
- Frost with the crumb coat in the same way you did with the bottom layers.
- Place the last 6-inch cake on top and frost with the crumb coat.
- Use the remaining crumb coat to frost any exposed areas of the cake.
- Place the cake in the refrigerator for 30 minutes, until this first layer of frosting hardens.
- Remove the cake from the fridge and frost with the second bowl of frosting (the clean frosting) using a clean spatula or butter knife.
- Top the cake with sprinkles and decorate with the cat decorations.
A note on crumb coats
When layering a dark chocolate sponge cake with pristine white vanilla buttercream, a crumb coat is your best defense against a speckled finish. Before you begin, divide your frosting into two separate bowls. The first batch is dedicated entirely to the crumb coat—a thin, foundational layer smoothed over the cake to trap and lock in any loose crumbs. By keeping this frosting isolated, you ensure that not a single dark crumb makes its way into your second bowl. Once this initial layer is applied, chill the tiered cake until the frosting is firm to the touch, leaving you with a perfectly clean canvas for your final layer of buttercream.