
Yesterday was Connor’s birthday. Fourteen years old! I can’t believe it. I remember when my children were younger. I would often get together with other moms and let the kids play. Frequent topics of conversation included comparing our experiences of the ages and stages our kids seemed to be flying through. “This age is my favorite!” someone would remark. “No, last year when he still let me rock him to sleep – that stage was my favorite,” someone else might interject. I have to say, truthfully, I love every single age and every stage – from birth to teenage-hood, there hasn’t been one I would wish away! Each year is exciting, full of growth and surprises. Like turning the pages in an enthralling novel, I’m looking forward to the future as much and I treasure the memories of the past. Being a mom is the single most fulfilling job on this planet.
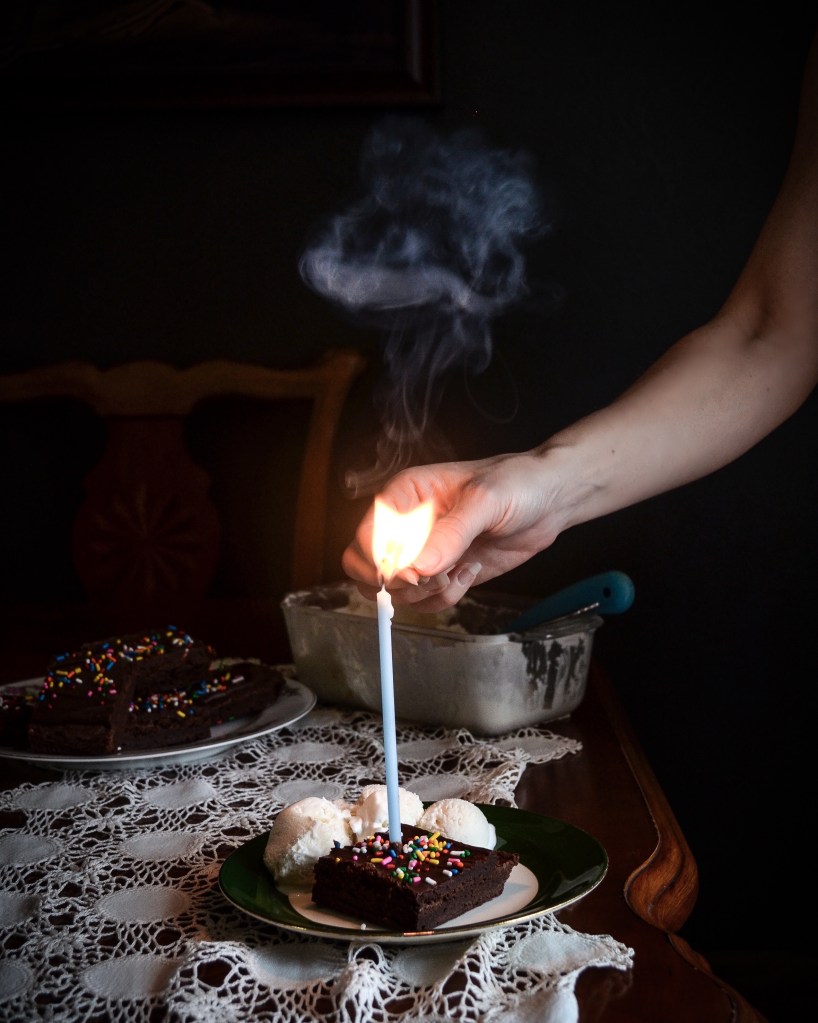
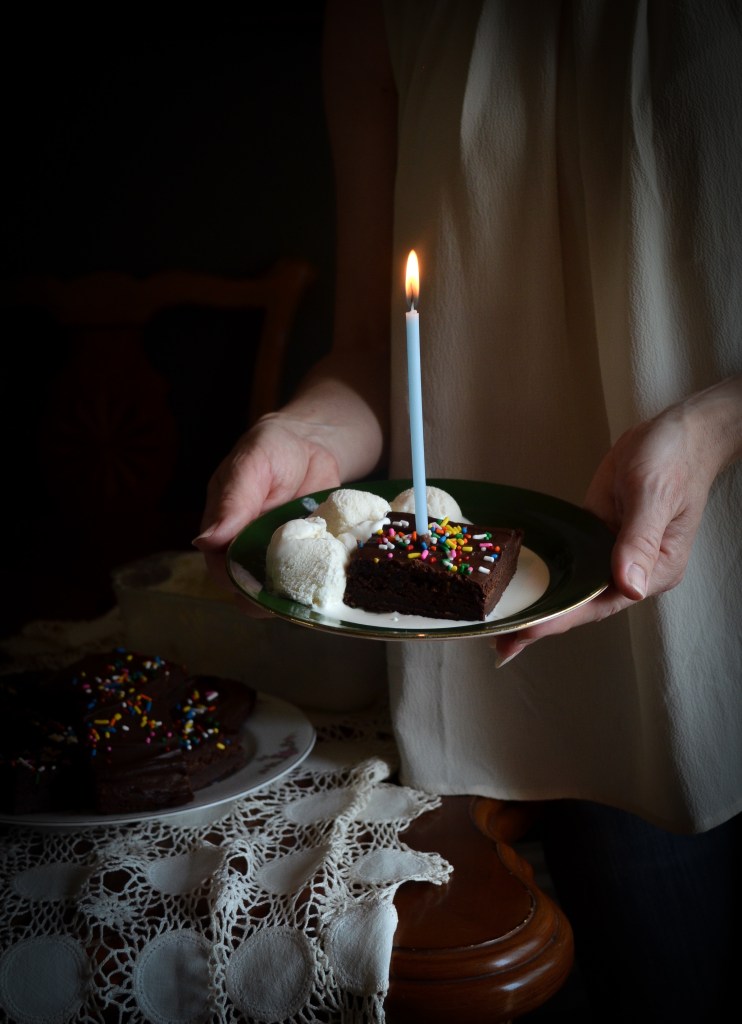
Every year, on his birthday, Connor asks for his favorite dessert – dirt cake – a gooey, chocolatey, triffle-like concoction made of crushed Oreo cookies, layered with ribbons of vanilla custard and clouds of whipped cream. We jokingly call it the “every-bowl-in-the-kitchen” cake because it literally uses every single bowl to make. It was my brother’s favorite cake as a child (still is, actually), and the recipe, naturally, was passed on to me. I’ve been making it since Connor was a little boy and I’ve shared a healthier version on my old blog using homemade cookies instead of the Oreos. You can find here, along with some cute photos of when the kids were younger. 😉 This year, my mom dug out all her mixing bowls and made Connor his dirt cake and we celebrated together on Sunday. In our family, traditionally, we celebrate birthdays twice – first with a big family dinner on Sunday afternoon. And second, on the actual day, with a small, relaxed celebration. Candles are lit, presents are opened and, in days prior to coronavirus, friends might come over for the afternoon. When I asked Connor what dessert he wanted for his “actual” birthday this year, I was glad he didn’t ask for another dirt cake. Instead he chose brownies with homemade ice cream. That sounded perfect to me.
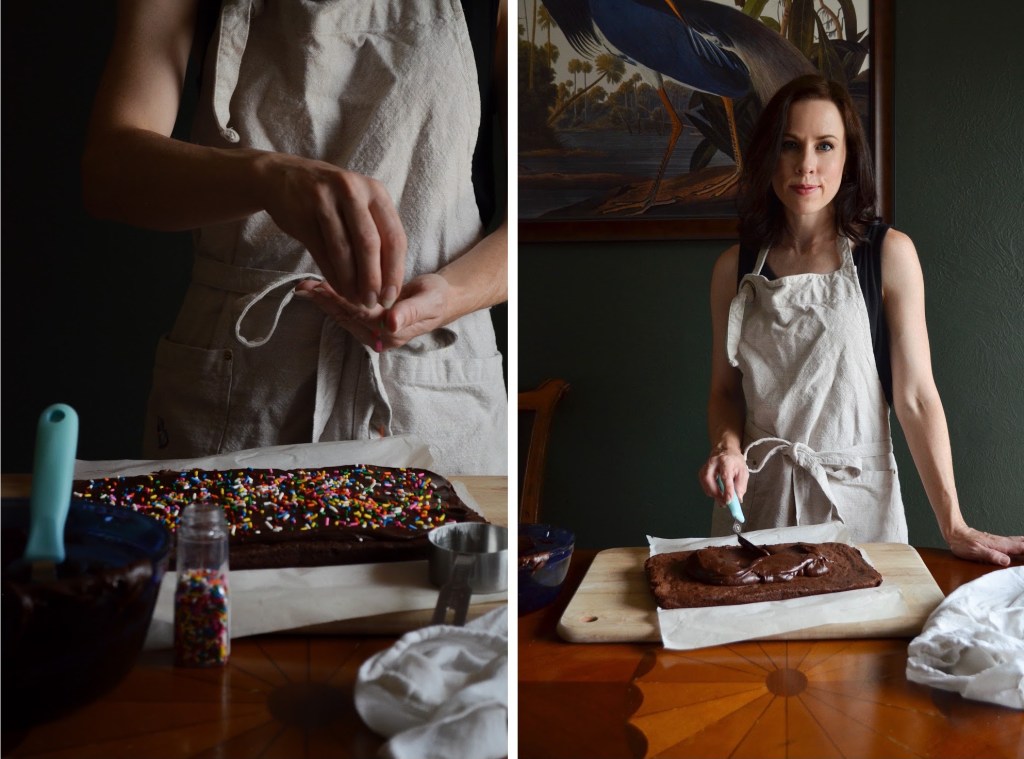
Most of the brownie recipes that I’ve come across on the internet and in cookbooks are baked in an 8-inch by 8-inch pan. Sensible? Yes. However, for my family that’s just way too small. I make these in a 9 by 13-inch pan which, if we go easy on them, gives us a day or two of leftovers. They are molten-ly gooey in the center and crisp and flakey on the outside. Just the way a brownie should be. These brownies are perfect on their own – I make them often when I need a quick chocolate fix – but since we were in a celebratory mood I wanted them to be a little special. I frosted them with rich, chocolate icing, topped with an explosion of “funfetti” sprinkles. The recipe works as well at high altitude as it does at lower elevations. Bonus: the batter is made entirely in one single sauce pan, leaving plenty of bowls in the kitchen to make the ice cream.
Speaking of that, brownies are only half complete if there isn’t a scoop of cool ice cream served alongside. The ice cream recipe is a standard in my kitchen. I make it on repeat throughout the year. It couldn’t be easier – simply combine milk, cream, vanilla and sugar and let the ice cream maker do all the work. I use organic cream and milk from a local dairy which we are lucky to have delivered straight to our house. Nothing compares to fresh, organic homemade ice cream.


Frosted Espresso Brownies
Before starting this recipe keep in mind that the brownie batter is made in a sauce pan so choose one that will be large enough. I use a 3qt stainless steel pan, which works well.
for the brownies:
- 12 Tbsp unsalted butter (plus more for greasing the pan)
- 2 cups granulated sugar
- 3 large eggs, room temperature
- 2 teaspoons vanilla extract
- 1 cup all-purpose flour
- 1 cup unsweetened natural cocoa powder
- 1 teaspoon salt
- 1 teaspoon instant espresso powder
for the icing:
- 8 TBSP butter
- 2/3 cup natural cocoa powder
- 3 cups confectioners sugar
- 1/3 cup whole milk
- 1 teaspoon vanilla extract
- pinch of salt
- rainbow sprinkles
Preheat the oven to 350F/180C. Line a 13 x 9 inch (33 x 23 cm) baking dish with parchment paper which slightly overhangs the sides of the pan. (You’ll use the parchment paper as handles to lift the brownies from the pan after baking.) Lightly butter the paper and any exposed sides of the pan. Set aside.
In a medium sauce pan, melt 12 tablespoons of butter over medium-low heat. Remove from the heat as soon as the butter is melted and whisk in the sugar. Add the eggs and vanilla and continue whisking. Place a sieve over the pan and sift the flour, cocoa powder, espresso powder and salt into the mixture. Stir with a wooden spoon until evenly combined.
Spread the batter evenly in the baking dish. Bake for 25 – 28 minutes, until the center of the brownies is just set.
Remove from the oven and let cool completely in the pan before frosting.
To make the icing, place the butter in a microwave safe mixing bowl and melt in the microwave. Whisk the cocoa powder into the butter until smooth and glossy. Whisk in half the confectioners sugar followed by half the milk. Repeat with the remaining sugar. Add just enough of the remaining milk (you may not need to use it all) to create an icing that’s smooth and spreadable. Whisk in the vanilla and salt.
Using the parchment paper as handles, lift the brownie from the pan and place on a cutting board. Spread the icing over the brownie and top with the rainbow sprinkles. Cut the brownies into squares and serve with ice cream.
Store the brownies covered in the refrigerator.
Easy Vanilla Ice Cream
- 1 1/4 cups whole milk
- 1/2 cup granulated sugar
- 1 3/4 cups heavy cream
- 1 TBSP pure vanilla extract
- 1/8 teaspoon fine salt
In a mixing bowl, combine the milk, sugar, vanilla extract and salt. Whisk until the sugar is dissolved. Add the cream and whisk gently to combine. Place the ice cream base mixture in the refrigerator for at least one hour or up to 12 hours.
Be sure your ice cream maker bowl is well frozen. Pour the ice cream base into the mixer and churn according to the manufacturer’s directions. In my ice cream maker it takes approximately 20 minutes. Transfer the ice cream to a freezer safe storage dish. Cover and place in the freezer until firm.


Looks like a wonderful celebration! Happy Birthday Connor!
LikeLiked by 1 person
Thank you! He did have a wonderful day!
LikeLiked by 1 person